Hi, Kfd.......Sorry for the late reply.
After tying your Guild Wraps, thread on, you need to seal the whipping thread with varnish. DANGER! This is where it might all go wrong. Practice first on a piece of scrap. An old rod or chopsticks with a ring tied on.
For a repair, you can use model makers dope, or more conveniently, clear nail varnish in a bottle with a brush, to seal your whipping thread. Failure to seal will result in your rings falling off very quickly. To make a permanent job you need to use varnish.
Professional rod builders use either two pack epoxy high build resin, or sometimes a UV curing system. The epoxy systems give a great finish and are the only type available for amateurs. Prior to epoxy arriving on the scene, all rods were built using traditional varnishes, similar to clear yacht varnishes. This air dries slowly, and needs several coats to give a decent finish, but it remains a good option for the amateur. It is also easier to remove rings and replace them when worn, if they have been varnished in place with traditional varnish. Traditional varnishes are easy to apply .
Epoxy resin makes great glue, is used in composite structures, and can be used as a varnish. The formulations for these are different, so make sure you varnish with epoxy designed as a varnish. Araldite will not do! Hopkins and Holloway market a Seymo rod varnish, and the other well known brand is Flex-Coat. These are solvent free systems designed for hi-build and are different from epoxy paint systems. These recommended systems consist of two syrupy liquids you mix together to make varnish which will chemically cure.
Whilst you are coating the whippings, keep the rod section turning in your hand to prevent runs developing. Finish each whipping with a small spot of varnish in the angle between ring leg and blank. A quick blast with your hair dryer whilst rotating the rod will make the varnish flow into one clear smooth coating. You must keep the blank turning all the time you are working.
Also need special racks that rotate rods for the full duration of the curing period. The amateur will need a little spare time and devotion to the job.
To cure your newly varnished section you need that box described earlier, and a warm room. A cardboard box should have v slots cut into it to hold the rod sections horizontally. As each section is finished, place it into the slots and rotate it at intervals. As the section is rotated, sags or runs that are developing will run back. Regular rotation will result in a run free professional job. Initially, you need to rotate that section every few minutes. Room temperatures effect this greatly, you will just have to check you work regularly. As time goes by, in a warm room, you will soon be able to extend the intervals between rotations. Under warm conditions, epoxy varnish should be alright to be left alone after about two hours. Full cure of epoxy can take between a day and a week. Do not let the job go suddenly cold or expose it to high humidity before full cure. Humidity will cause a bloom.
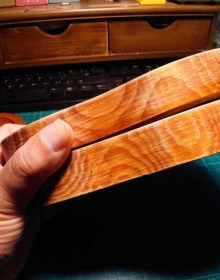
Excess resin can be removed with cellulose thinners or nail varnish remover, but these can damage the gloss finish on painted blanks. For your first build job, an unground natural finished blank is the number one choice. Test any thinners on a small area of blank first.
Tip: A rough guids is that for every rise in temperaure of 10C, the curing time is halved. If the finished job is slightly soft or sticky a second coat will help activate the cure in the layer below.
Alway simple the better,I trust you in the end will buil up the beautiful rod. and hope it will give you much pleasure.
Cheers,
Bill
|


 顯身卡
顯身卡
 大開眼界,但越睇越迷
 !
! 樓主
樓主